This article describes the step-by-step process to remotely add a new User Account (NTRIP Client) to the Caster. When the Web API Plug-In is present, SNIP allows adding new User Accounts remotely with a browser. For the Caster Admin account this process is never limited (you can create as many NTRIP Client accounts as you wish). For Customer Accounts, the number of Users which can be added by that Customer is limited by the value set by the Caster Administrator for the Customer. An active Web API Plug-in is required for this feature. First Login from an authorized account with read-write privileges, not with read-only privileges.
From the Web API top page, go to the Current Client Connections and Accounts section at the top of the page. Press the button marked Add a New User Account (NTRIP Client). This button is displayed below the (optional) table of users which are sending in $GGA sentences (which you can enable/disable in the Preferences dialog).
You will then be taken to a page to establish the name to be used with new User Account. See this article for details of the naming process. Once a name has been determined, you will be taken to the New Account page, shown below (click to enlarge).
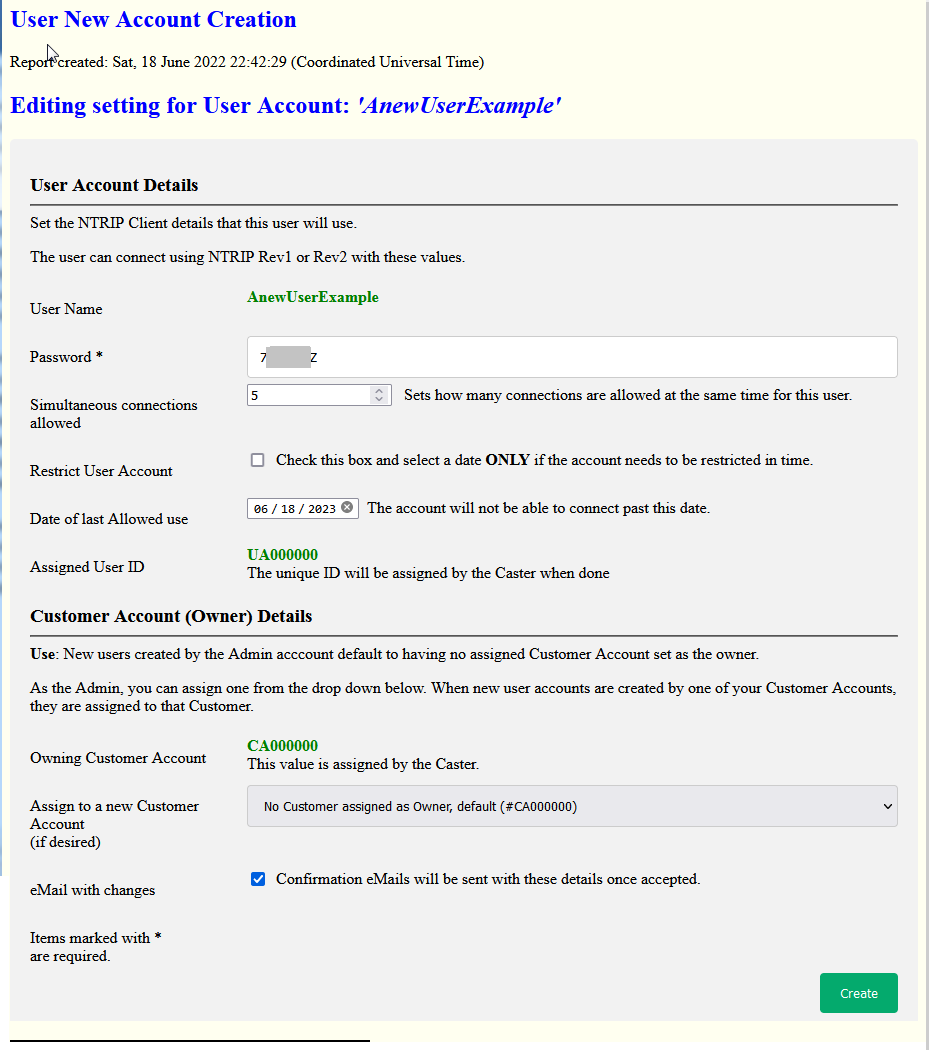 The data fields all follow the same general flow as the SNIP dialog for a new User Account does.
The name you enter on the prior page is used. This is the name the NTRIP Client will use to connect.
The password field is completed with a suggested password. You may change this if desired. This is the password the NTRIP Client will use to connect.
The number or simultaneous connections is how many concurrent connection the account is allowed to have. You may wish to set this value to be “1” depending on how you allow your clients access.
Not every user restriction type is can be set on the Web API page. The most common one is, restricting Caster access to an end date beyond which the user can no longer connect (typically tied to a subscription service of some kind) is provided.
The reminder of the form deals with assigning ownership of the User Account to a Customer Account (or by default the Admin account). Select the Customer Account you want from the drop down menu.
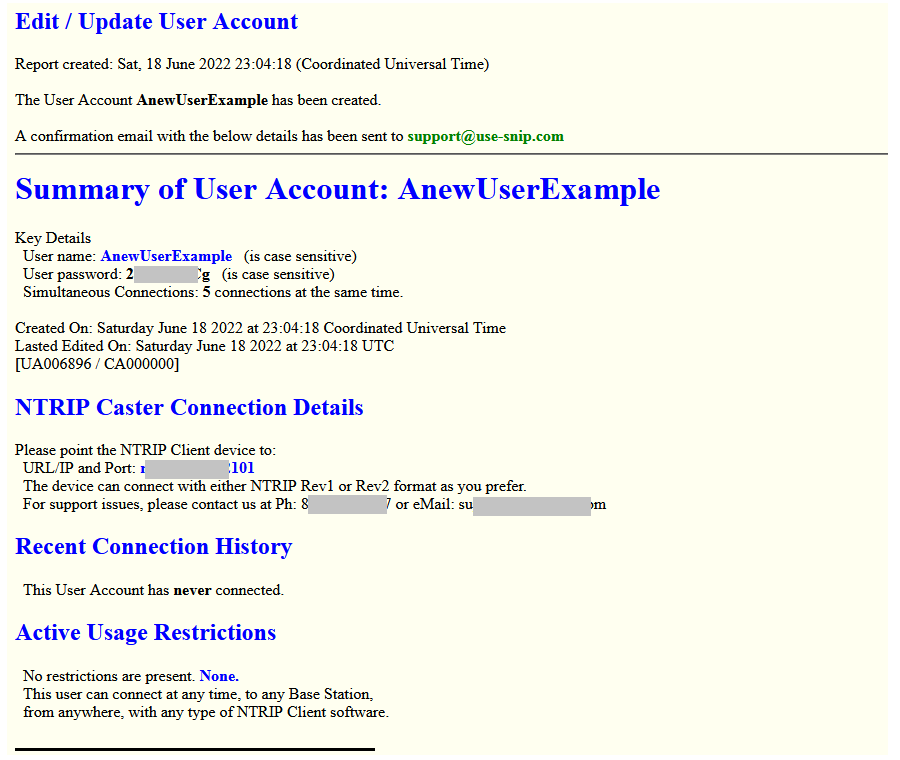
When the form is submitted (press the Create button), the new account is created and an email with similar details is sent to the Admin and the owner of the account (if the eMail Plug-In is active) See the below image. If there are any creation problems, a page with a summary of the errors is presented.
Use by Customer Accounts
When this process is performed by a browser logged in with a Customer Account, the top of the page also provides a summary of how many User Accounts they have already created (and therefore own) and how many more they are allowed to create. The ownership section is automatically assigned to their account (and they cannot edit this).