Topic
This article describes the process steps for moving your registered SNIP installation to another machine. This applies to those users with Basic, Pro, and Enterprise level licenses. It does not apply to Lite users. Any additional stream licenses you have purchased will also be transferred to the new machine. All of the license keys you have purchased are moved as a group from the old machine to the new one.
After the move is completed, you can run SNIP on the new machine using the same license with the same stream rights. [Be sure that the new machine is equipped with a suitably numbered serial port and other connections you expect to find.] The older machine will no longer run under that license, but you can still use it in the Lite mode which requires no license, or you can purchase additional licenses as needed. There are no limits on how often you may move your SNIP installation, but as the process is time consuming it typically occurs only when there is a need for a hardware change.
Overview
The process uses the same wizard as used in the registration process.
A summary of three major steps are as follows:
- Export the license file from the active machine to be decommissioned
- Dissociate that machine from the license using your user account with use-snip.com
- Import the created license file on the new (target) machine.
Step-by-Step
Exporting your license data:
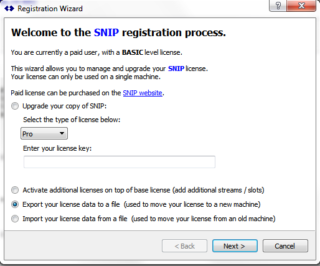
- Launch SNIP, then go to Help->Registration to open the registration wizard
- Select the “Export your license data to a file” option
- Select the target location to generate the file, then click on the “Export” button
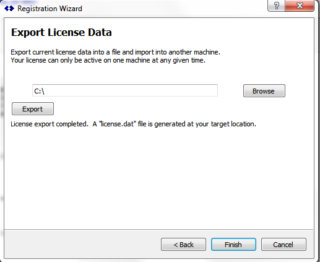
- Once complete, click “Finish” to close the dialog. A “license.dat” file should be generated at the target location


Dissociating the license key with the previous machine:
- Go to use-snip.com then log in to your user account.
- Once logged in, go to the “Account” Page, which should display the purchase history page with all license keys listed.
- Find the key you would like to dissociate, then click on the “View Licenses” option.
- A status page for the selected license key will be shown. Note that an activation of “1/1” indicates that the license key was previously activated on another machine. To dissociate it, select “Manage Sites,” then select “Deactivate Site” in the next page. Now the activation number should be “0/1” indicating that you can register the new machine.
Note: The very first time you log in to your SNIP account, you will be taken to your “profile” page. You can optionally fill this in, or skip it. To get to the ‘main’ page (and hence the button that will allow you to access your SNIP license management details), the click the SNIP logo in the upper left corner.
Importing your license data:
- Once the key dissociating is completed, go back to the SNIP registration wizard, and select the “Import your license data to a file” option.
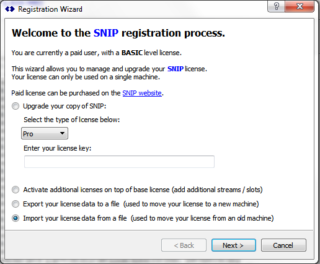
- Browse to the “license.dat” file that was generated during the export step, then click on the “Import” button.
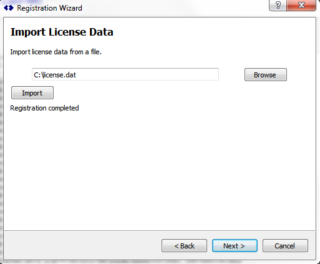
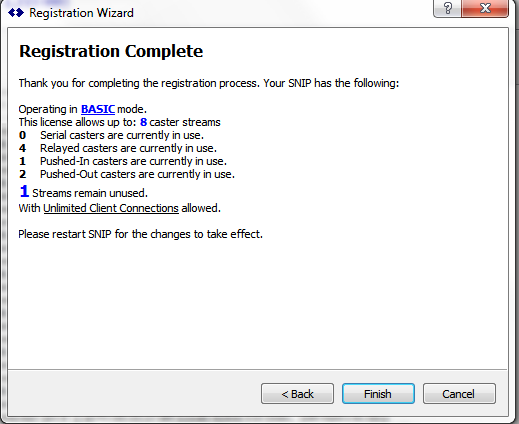
- Once complete, the final page will list the license rights associated with the license. It is recommended that you restart SNIP at this point for the new license to take effect.