During license registration, SNIP requires an SSL (secure-socket-Layer) connection to communicate with the licensing server. The purpose is to ensure that users can send their information to the licensing server in an encrypted and secured manner. If a user encounters a “SSL connection required” message prompt, please go here to download and manually install the 32-bit OpenSSL package (not the 64 bit package).
Windows users: As the Windows build is 64 bits, you will want this file: Win64 OpenSSL v1.0.2L Light
This no longer an issue for most Windows users without a native SSL solution. SNIP now handles installing the needed DLLs as part of the overall installation process. This was generally resolved in version 1.1.0 [released on December 2nd 2016] Hint: If you do not any see Google Maps displayed (you see only a bank page), this is also an indication that your machine can not establish an SSL link.
UPDATE
However at least some users with Windows 10 have experienced this issue (with a current release 1.6.0 copy) so the above link can still be of value to some. If you have this issue with a copy of Windows 10, the above link has been able to install the required drivers and overcome the registration problems these users experienced.
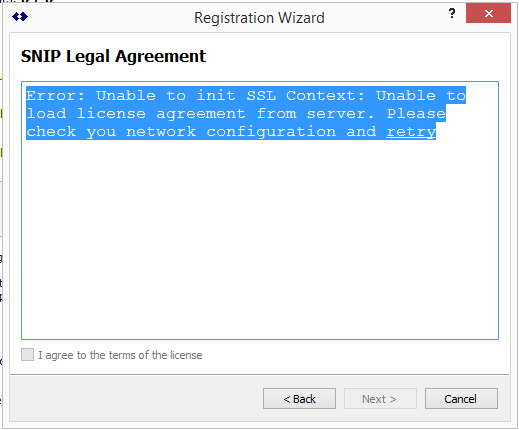
The registration script was slightly modified (in release 1.6.0) to fetch a copy of the SNIP software license text by means of the SSL socket (rather then the local file copy). This allows confirming that SSL connections can be made before they are in fact needed in a subsequent step.
If you see the below screen during registration, this indicates that the default SSL installation on your machine is being blocked and you will need to install the OpenSSL package as indicated above to use SNIP.